We have been working with DJI Ronin-M gimbal for more than a year now and there were a lot of compromises and upgrades that were made in this time. This is such a great tool to work with when configured properly. It is not perfect in all views, though. No matter how good do you stabilize the camera, you’ll always get some slight shaking in video visible only in post-production. That is why we are mostly using lenses with own stabilization. It is better to be sure than sorry. Another thing is that you don’t have stretchable arms on a gimbal that’s why the camera can hit the back. It is very annoying if you want to use the up-mode. Also, you need to put a lot of time into tweaking the whole setup before using. You don’t want to get shaky footage or it just let it hang up while working. In the beginning, we had a lot of trouble because of rotation into the left making all footage out of horizontal level.
We even tried to put the Sony FS700 with an external recorder on to DJI Ronin-M. It was supposed to be impossible because of camera ergonomics and connectors in the back. It actually works if you put small lifting weight somewhere in the back (or any kind of heavy metal – lead perhaps). Also, you need to use small and lightweight lenses. It would be impossible to put on the follow focus though. Right angle SDI connector for the recorder is urgent to have.
But, if you use setups like the Sony A7s or similar, there are few things to consider to have. We added these gadgets through the year of usage and are now always included in the package.
Follow Focus via Thumb Controller
There aren’t many follow focus systems you can put on DJI Ronin-M gimbal. We found out that Ikan PDMovie remote live with thumb controller was the best choice at the time. It is simple, accurate and high quality build. It is a bit heavy on the motor side for that reason too. In most setups, it would be mounted on the lens via a rail system but in our case, that wasn’t possible. We’ve used the screw hole on the gimbal plate to screw on a light stand conversion adapter. It is just perfectly thin to put on the follow focus motor.
What is great about follow focus on gimbal is that you can constantly repair focus, you can actually make more dynamic shots without the worry about unsharp image. Of course, if you use an external monitor to preview the focus.
Quick Release Plate system
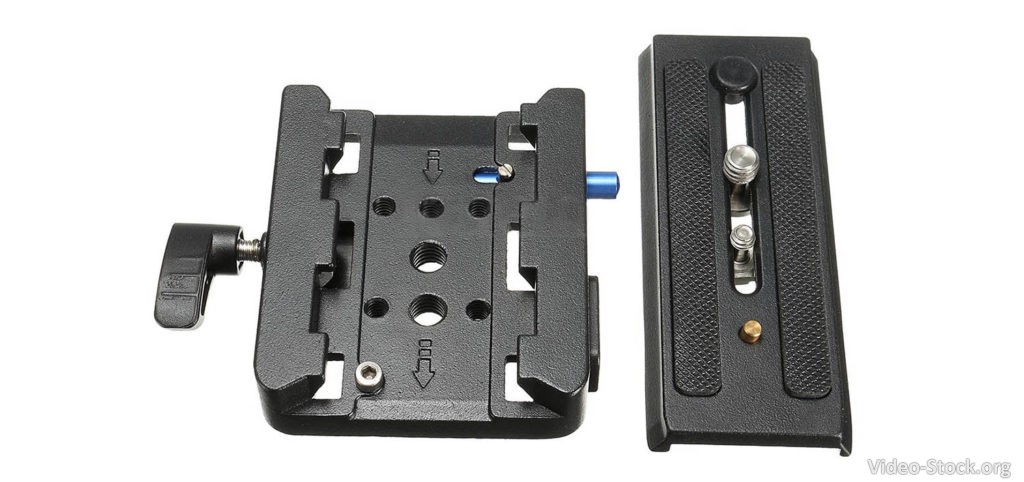
We’ve come up with another plate system on gimbal stabilizer after going crazy because of constantly changing the different plate sizes. Manfrotto is our basic plate system, while DJI Ronin-M has a bit wider plates. With a help of cheap copy of Manfrotto plate system, you can attach it to DJI plate and then use on one plate standard on all tripods and other equipment. It is a very simple hack that saves a lot of time.

Of course, you gain some extra weight with such hack. But again it really helps saving time which is more important on shooting set.
Monitor & Holder
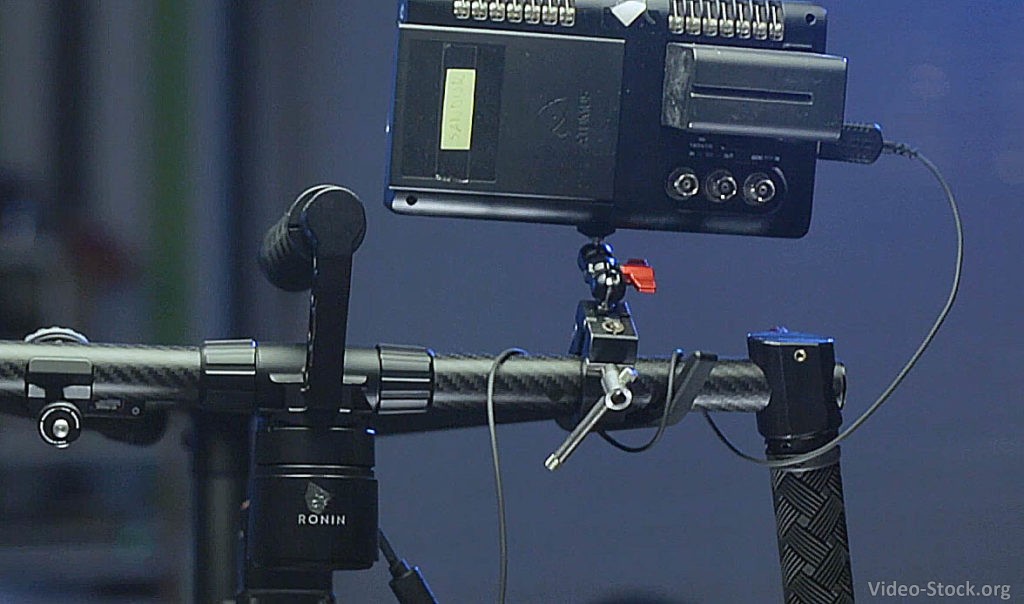
Because we are using Sony A7s on gimbal stabilizer, it would be impossible to see focus, right framing, and suitable light settings while shooting. Their LCD monitor is complete crap. That is why it is great to use external monitor attached to handless of gimbal stabilizer. In our case, we use Atomos Shogun, because we also record high-quality 4K video directly on SSD drives via thin HDMI cable. This is also very good preview monitor for many reasons. You can see focus so well because of its 1920x1080p screen resolution. Also, you can apply LUT preview for much easier feeling of a finished product.

But most importantly, how to mount the monitor on Ronin-M handles? At first, we’ve tried some basic magic arms but were so heavy and clumsy to use. Then we found clamp mount with a short magic arm which is good enough to hold such a heavy recorder. We are also using the same short magic arm on Sony FS700 with Shogun Inferno recorder and it holds it perfectly in place.
Dummy battery for camera
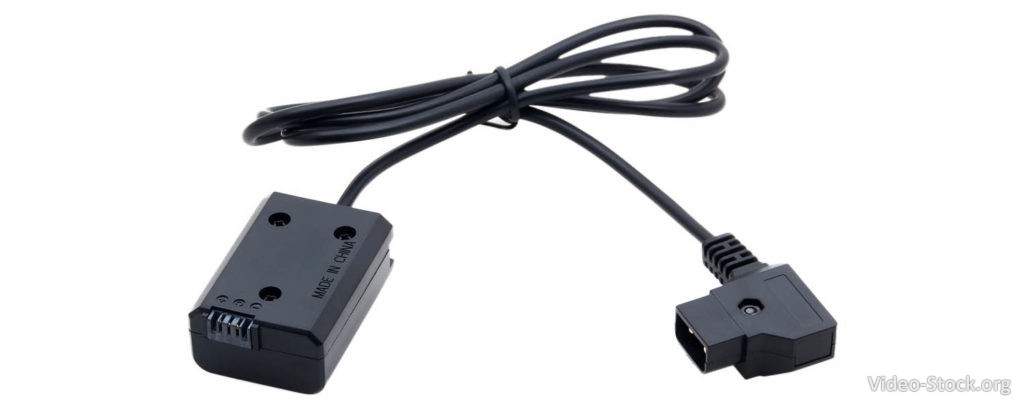
Everybody knows that the battery life on Sony A7s is a disaster. Later versions of the same product at least have USB charging feature. But our old A7s doesn’t. If the camera supports USB charging you can use D-Tap to USB converter. This way we can charge the camera via Ronin-M battery. In our case, we bought the D-Tap adapter and the dummy battery. But now you can already buy D-Tap to NP-FW50 dummy battery version.

With this gadget, we already forgot about any battery problems. You could also charge the monitor in such a way, but you’ll use the Ronin-M battery much more sooner. While A7s camera doesn’t use so much energy to work and the Ronin battery won’t exhaust so fast.
Backpack for transporting
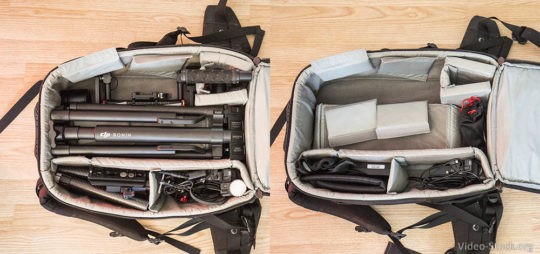
Transporting the DJI Ronin-M might be bothersome in a plastic suitcase. They are heavy, use a lot of space and are cumbersome to carry. If you are not transporting equipment with a plane, a decent photo backpack is more than good enough to carry around the DJI Ronin-M parts. We are using the Lowepro Vertex 300 AW. Of course the backpack is not made for such pieces of equipment, that is why we improvised the inside sections placement.
It is a pretty simple packing. The main framework is on the bottom and all else over top and side sections. Some smaller things such as cables and screw adapters are in the front pockets. It’s not exactly economically used space, but yet again you can put much more equipment into the backpack than in the plastic pelican protective case with premade holes only for specific parts of the frame.
We always tried to only buy things that are useful in the long run. We rarely buy impulsively with no extra thinking. Sure, we had many problems getting suitable SDI or HDMI cable for our camera. Because in many cases they don’t write all technical details about it and you can only try it blindly. Of course, a lot of money can be wasted for that reason. If we are in video production business this is completely natural. It is an endless money eater.


